原文
https://medium.flutterdevs.com/dialog-using-getx-in-flutter-248601043311
参考
正文 了解如何在您的 Flutter 应用程序使用 GetX 创建一个对话框
在 Flutter 使用 GetX 对话框
是移动应用程序的基本组成部分。他们帮助传递警告和重要信息,以及做具体的活动。当 Flutter 开发人员在 Flutter 制作一个对话框时,它利用上下文和生成器制作一个对话框。然而,对于开发人员来说,利用上下文和构建器来培养 Dialogs 是不合适的。
在本文中,我们将探索在 Flutter 使用 GetX 的对话框。我们还将实现一个演示程序,并了解如何使用您的 Flutter 应用程序的获取包创建对话框。
获取 | Flutter Package GetX 是一个超轻和强大的解决方案 Flutter 。它结合了高性能的状态管理,智能..
https://pub.dev/packages/get
Introduction: 简介: 当我们需要显示任何类似表单的内容时,我们可以创建这个对话框,它涉及 Flutter 的 GetX 库。我们可以使对话框利用 GetX 的基本代码和非常简单的使一个对话框。它没有利用上下文和生成器来创建对话框。
是 Flutter 问题的附加轻量强解。它加入了精英的性能状态管理、智能依赖注入管理和路由管理。
演示模块:
这个演示视频展示了如何在 Flutter 中创建一个对话框,并展示了如何使用您的 Flutter 应用程序中的 get 包来工作,以及使用不同的属性。它会显示在你的设备上。
Constructor:
要使用 Get.defaultDialog () ,需要调用下面的构造函数:
1
2
3
4
5
6
7
8
9
10
11
12
13
14
15
16
17
18
19
20
21
22
23
24
25
26
27
Future<T?> defaultDialog<T>({ String title = "Alert" , EdgeInsetsGeometry? titlePadding, TextStyle? titleStyle, Widget? content, EdgeInsetsGeometry? contentPadding, VoidCallback? onConfirm, VoidCallback? onCancel, VoidCallback? onCustom, Color? cancelTextColor, Color? confirmTextColor, String ? textConfirm, String ? textCancel, String ? textCustom, Widget? confirm, Widget? cancel, Widget? custom, Color? backgroundColor, bool barrierDismissible = true , Color? buttonColor, String middleText = "Dialog made in 3 lines of code" , TextStyle? middleTextStyle, double radius = 20.0 , List <Widget>? actions, WillPopCallback? onWillPop, GlobalKey<NavigatorState>? navigatorKey, })
Properties:
有一些 Get.defaultDialog ()的属性:
> title : 此属性用于对话框的标题。默认情况下,标题为“ Alert”。> titleStyle : 此属性用于使用 TextStyle 给标题文本赋予的样式。> content : 在这个属性中用于给出对话框的内容,并且应该使用 Widget 给出内容。> middleText : 此属性用于对话框的中间文本。如果我们也利用内容,那么内容小部件数据将被播种。> barrierDismissible : 如果我们想通过单击对话框外部来关闭对话框,那么这个属性的值应该为 true else false。默认情况下,它的值为 true。> middleTextStyle : 此属性用于使用 TextStyle 给中间文本赋予的样式。> radius : 在此属性中使用的是提供的对话框的半径。默认情况下,它的值为 20。> backgroundColor : 在这个属性中用作对话框的背景颜色。
Implementation:
将依赖项添加到 pubspec ー yaml 文件。
1
2
3
4
dependencies: flutter: sdk: flutter get : ^4.6 .1
1 import 'package:get/get.dart' ;
第三步: 在应用程序的根目录中运行 flutter 软件包。
如何实现 dart 文件中的代码: 你需要分别在你的代码中实现它:
在 lib 文件夹中创建一个名为 main.dart 的新 dart 文件。
我们使用了 GetMaterialApp 而不是 MaterialApp,因为我们正在使用 GetX 库构建应用程序。如果我们不利用 GetMaterialApp,那么,在这一点上,它的功能将不工作。
1
2
3
4
5
6
7
8
return GetMaterialApp( title: 'Dialog Demo' , theme: ThemeData( primarySwatch: Colors._blue_, ), home: Splash(), debugShowCheckedModeBanner: false , );
我们将在 main.dart 文件中创建一个 Home 类
在正文中,我们将添加一个 Center 小部件。在这个小部件中,我们将添加一个 Column 小部件,该小部件的中心是 mainAxisAlignment。我们将添加一些东西,首先,我们将添加一个图像,其次,我们将添加一个带有子属性和样式属性的立面按钮。在 onPressed 函数中,我们将添加 Get.defaultDialog ()。我们将在下面深入描述它。
1
2
3
4
5
6
7
8
9
10
11
12
13
14
15
16
17
18
19
20
21
22
23
24
25
Center( child: Column( mainAxisAlignment: MainAxisAlignment.center, children: [ Image.asset("assets/logo.png" , scale: 14 ,), SizedBox(height: 80 ,), ElevatedButton( child: Text('Show Dialog' ), style: ElevatedButton._styleFrom_( primary: Colors._teal_, onPrimary: Colors._white_, shadowColor: Colors._tealAccent_, textStyle: TextStyle( fontSize: 18 , ), elevation: 5 , shape: RoundedRectangleBorder( borderRadius: BorderRadius.circular(20.0 )), minimumSize: Size(120 , 50 ), ), onPressed: () { Get.defaultDialog(); }, ), ], )),
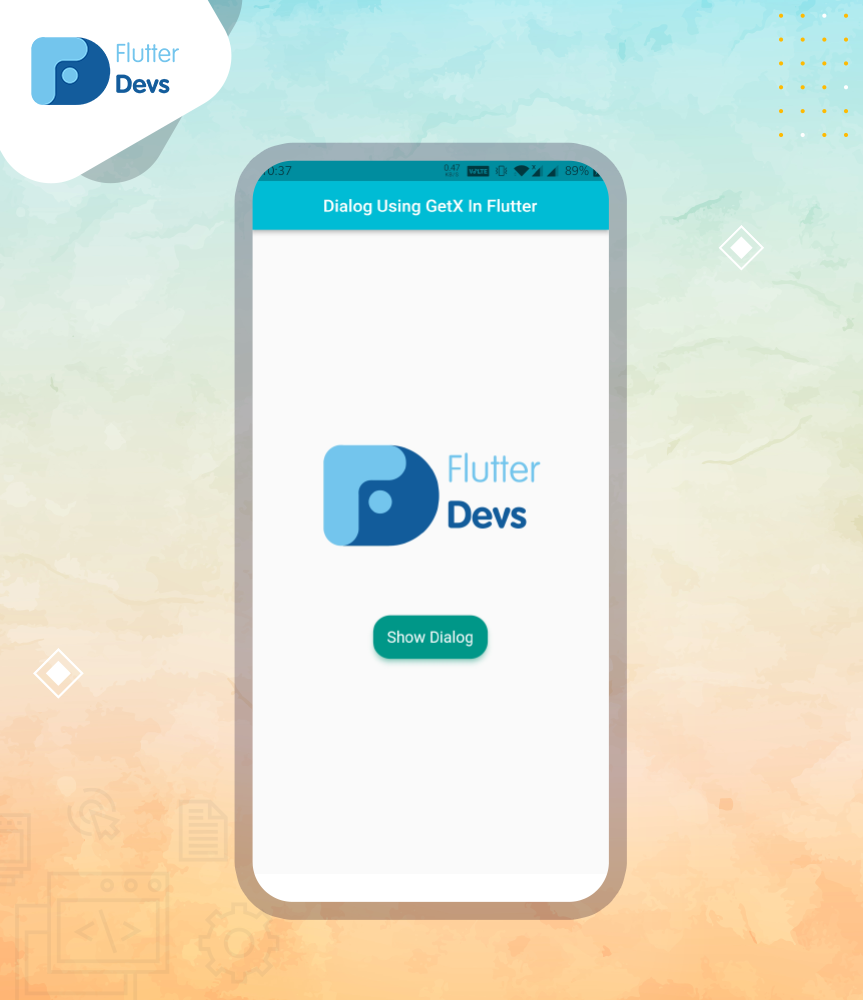
当我们运行应用程序时,我们应该得到屏幕的输出,就像下面的屏幕截图一样。
Home Screen 主屏幕
现在,我们将深入描述 Get.defaultDialog () :
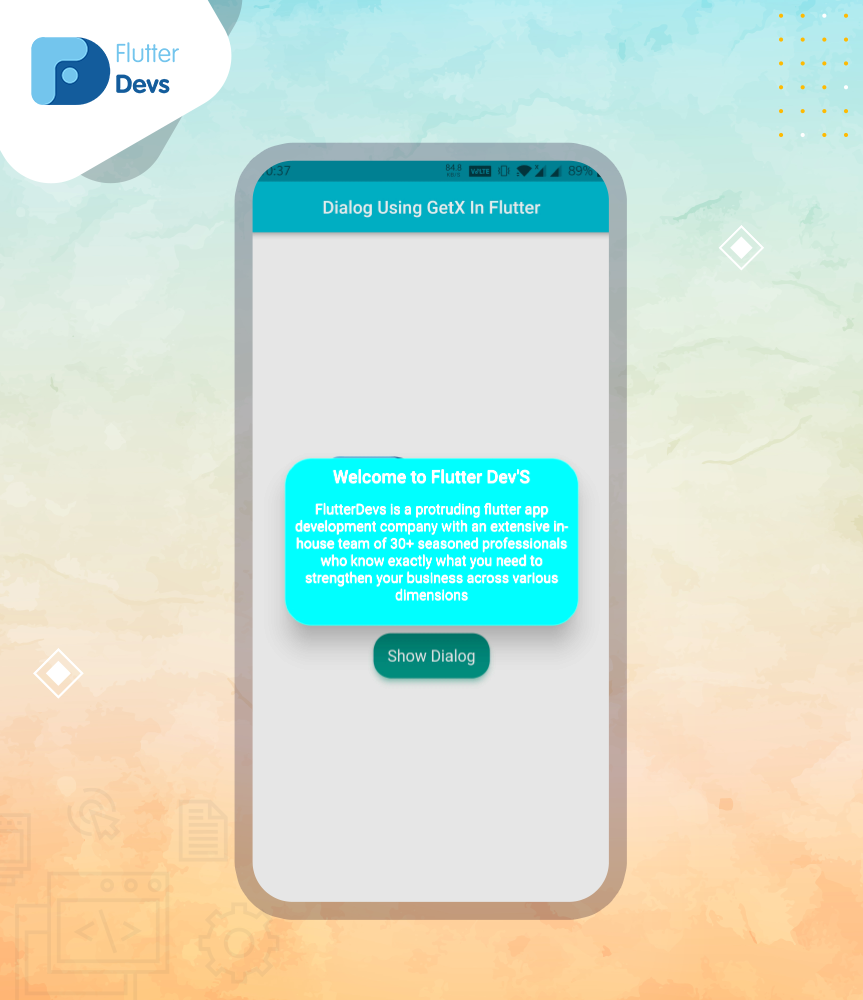
现在您看到了在 Flutter 使用 GetX 获得只有很少行的对话是多么容易。您还可以使用 GetX 提供的不同选项对其进行自定义。我们将添加标题,中间文本,背景颜色,标题样式,中间文本样式和半径。
1
2
3
4
5
6
7
8
9
10
Get.defaultDialog( title: "Welcome to Flutter Dev'S" , middleText: "FlutterDevs is a protruding flutter app development company with " "an extensive in-house team of 30+ seasoned professionals who know " "exactly what you need to strengthen your business across various dimensions" , backgroundColor: Colors._teal_, titleStyle: TextStyle(color: Colors._white_), middleTextStyle: TextStyle(color: Colors._white_), radius: 30 );
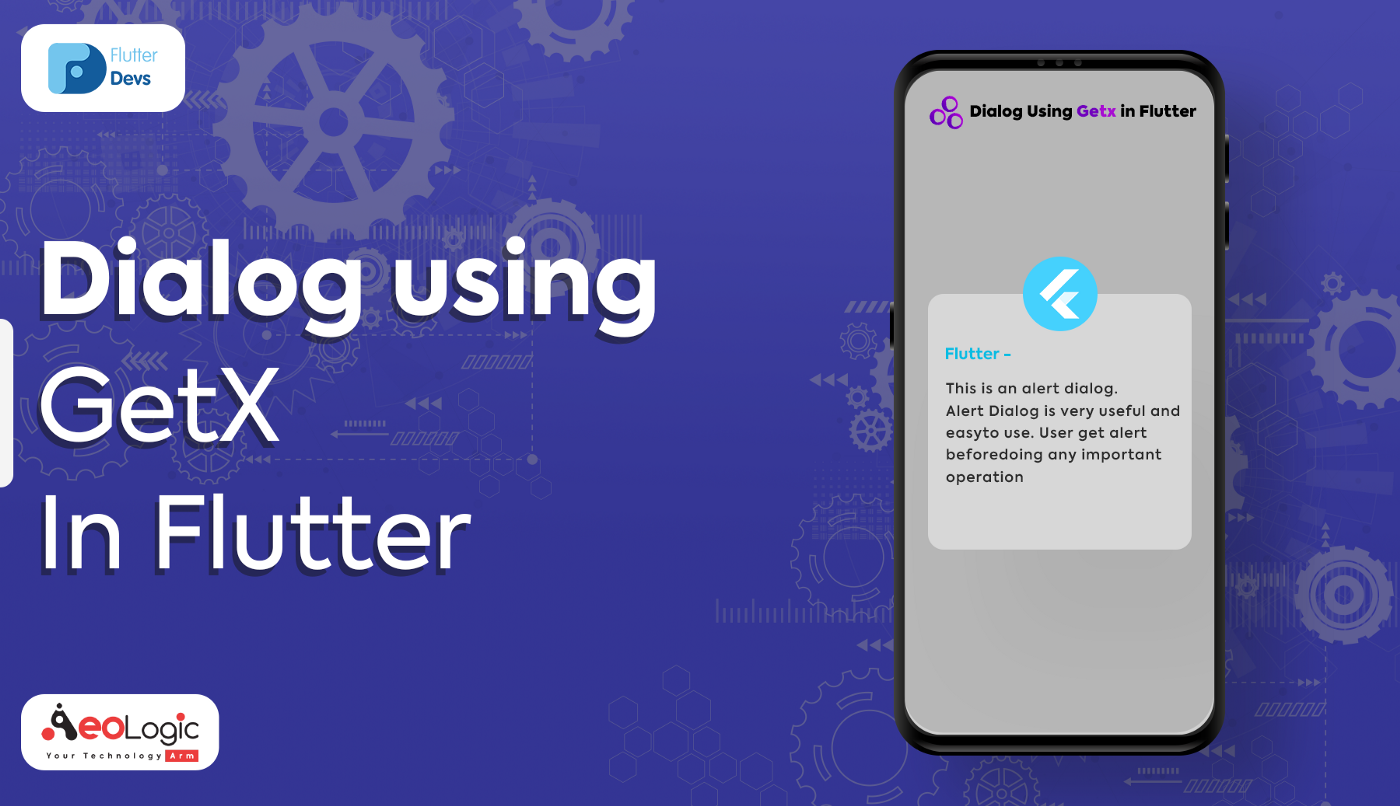
当我们运行应用程序时,我们应该得到屏幕的输出,就像下面的屏幕截图一样。
Final Output 最终输出
全部代码: 1 2 3 4 5 6 7 8 9 10 11 12 13 14 15 16 17 18 19 20 21 22 23 24 25 26 27 28 29 30 31 32 33 34 35 36 37 38 39 40 41 42 43 44 45 46 47 48 49 50 51 52 53 54 55 56 57 58 59 60 61 62 63 64 65 66 67 68 69 70 71 import 'package:flutter/material.dart' ;import 'package:flutter_dialog_getx_demo/splash_screen.dart' ;import 'package:get/get.dart' ;void main() { runApp(MyApp()); } class MyApp extends StatelessWidget @override Widget build(BuildContext context) { return GetMaterialApp( title: 'Dialog Demo' , theme: ThemeData( primarySwatch: Colors._blue_, ), home: Splash(), debugShowCheckedModeBanner: false , ); } } class Home extends StatelessWidget @override Widget build(BuildContext context) { return Scaffold( appBar: AppBar( automaticallyImplyLeading: false , title: Text('Dialog Using GetX In Flutter' ), centerTitle: true , backgroundColor: Colors._cyan_, ), body: Center( child: Column( mainAxisAlignment: MainAxisAlignment.center, children: [ Image.asset("assets/logo.png" , scale: 14 ,), SizedBox(height: 80 ,), ElevatedButton( child: Text('Show Dialog' ), style: ElevatedButton._styleFrom_( primary: Colors._teal_, onPrimary: Colors._white_, shadowColor: Colors._tealAccent_, textStyle: TextStyle( fontSize: 18 , ), elevation: 5 , shape: RoundedRectangleBorder( borderRadius: BorderRadius.circular(20.0 )), minimumSize: Size(120 , 50 ), ), onPressed: () { Get.defaultDialog( title: "Welcome to Flutter Dev'S" , middleText: "FlutterDevs is a protruding flutter app development company with " "an extensive in-house team of 30+ seasoned professionals who know " "exactly what you need to strengthen your business across various dimensions" , backgroundColor: Colors._teal_, titleStyle: TextStyle(color: Colors._white_), middleTextStyle: TextStyle(color: Colors._white_), radius: 30 ); }, ), ], )), ); } }
结语: 在本文中,我已经解释了使用 GetX 的对话框的基本结构; 您可以根据自己的选择修改这段代码。这是我对使用 GetX 进行用户交互的对话框的一个小小介绍,它正在使用 Flutter 工作。
我希望这个博客将提供您充分的信息,尝试在您的 Flutter 项目使用 GetX 对话框。我们将向您展示介绍是什么?.使用 GetX 插件制作一个工作对话框的演示程序。在本博客中,我们已经研究了 flutter 应用程序的使用 GetX 的对话框。我希望这个博客能帮助你更好地理解这个对话框。所以请尝试一下。
© 猫哥
订阅号
邮箱 ducafecat@gmail.com / 微信 ducafecat / 留言板 disqus