猫哥说

这篇文章讲的是如何在你的动画中加入运动特性、运动球、重力、贝塞尔曲线、多边形、不规则曲线,如果你正在找这方面资料,这个源码你可要好好消化了。这都是动画中的基础,前端就是要酷炫,开始吧。

最佳体验还是阅读原文(链接在下面)。

老铁记得 转发 ,猫哥会呈现更多 Flutter 好文~~~~

微信 Flutter 技术群 ducafecat

原文

https://preyea-regmi.medium.com/implementing-motion-design-with-flutter-126d06b080ab

代码

https://github.com/PreyeaRegmi/FlutterMotionDesignSamples

参考

正文

大部分时间实现运动设计是一个有点累赘的移动应用程序。本文从更加实用的角度阐述了如何通过 Flutter 实现运动设计。我们将采取一个简单的运动设计从运球作为一个参考,并开始建设它一步一步。所有版权保留给各自的作者,实现的完整源代码可以在 github 上找到。

https://github.com/PreyeaRegmi/FlutterMotionDesignSamples

现在我们将重点放在登录/注册交互上。所以,就像其他的交互设计一样,我们将尝试把它分解成多个场景,这样我们就可以有一个清晰的整体概念,并将这些场景链接在一起。

场景 1: 初始状态屏幕

在这个场景中,我们在底部有一个弹跳的图像和文字,一个弯曲的白色背景,一个品牌标题包围着图像的中心和变形虫形状的背景。拖动底部的内容,直到一定的距离被覆盖,揭示动画播放和场景转换到下一个场景。

展示动画(中间场景)

在这个中间场景中,曲线背景高度是动画的。此外,在这个动画,控制点的三次贝塞尔曲线也被平移和还原,以提供加速效果。侧面的图标和变形虫背景也在垂直方向上 translated 以响应动画的显示。

场景 2: 后期显示动画状态屏幕

当显示动画完成后,品牌标题被一个圆形图标取代,一个标签指示器从屏幕左侧飞过来,相应的标签被加载。

现在我们有了设计中涉及的相关场景的概述。下一步,我们尝试将这些想法映射到实现细节中。那么让我们开始吧。

我们将使用 stack 作为顶级容器来托管我们所有的场景,并根据当前场景状态,我们将向 stack 添加各自的小部件,并动画他们的几何图形。

1
2
3
4
5
6
7
8
9
10
11
12
13
14
15
16
17
18
19
20
21
22
23
24
25
26
27
28
@override
Widget build(BuildContext context) {
List<Widget> stackChildren = [];

switch (currentScreenState) {
case CURRENT_SCREEN_STATE.INIT_STATE:
stackChildren.addAll(_getBgWidgets());
stackChildren.addAll(_getDefaultWidgets());
stackChildren.addAll(_getInitScreenWidgets());
stackChildren.add(_getBrandTitle());

break;
case CURRENT_SCREEN_STATE.REVEALING_ANIMATING_STATE:
stackChildren.addAll(_getBgWidgets());
stackChildren.addAll(_getDefaultWidgets());
stackChildren.add(_getBrandTitle());
break;
case CURRENT_SCREEN_STATE.POST_REVEAL_STATE:
stackChildren.addAll(_getBgWidgets());
stackChildren.addAll(_getDefaultWidgets());
stackChildren.insert(stackChildren.length - 1, _getCurvedPageSwitcher());
stackChildren.addAll(_getPostRevealAnimationStateWidgets());
stackChildren.add(buildPages());
break;
}

return Stack(children: stackChildren);
}

对于场景 1,所有相应的小部件都被定位并添加到 stack 中。底部“向上滑动开始”小部件的弹跳效果也立即开始。

1
2
3
4
5
6
7
8
9
10
11
12
13
14
15
16
17
18
19
20
21
22
23
24
25
26
27
28
29
30
31
32
33
34
35
36
37
38
39
40
41
42
43
//Animation Controller for setting bounce animation for "Swipe up" text widget
_swipeUpBounceAnimationController =
AnimationController(duration: Duration(milliseconds: 800), vsync: this)
..repeat(reverse: true);

//Animation for actual bounce effect
_swipeUpBounceAnimation = Tween<double>(begin: 0, end: -20).animate(
CurvedAnimation(
parent: _swipeUpBounceAnimationController,
curve: Curves.easeOutBack))
..addListener(() {
setState(() {
_swipeUpDy = _swipeUpBounceAnimation.value;
});
});

//We want to loop bounce effect until user intercepts with drag touch event.
_swipeUpBounceAnimationController.repeat(reverse: true);


//Animated value used by corresponding "Swipe up to Start" Widget in _getInitScreenWidgets() method
Positioned(
right: 0,
left: 0,
bottom: widget.height * .05,
child: Transform.translate(
offset: Offset(0, _swipeUpDy),
child: IgnorePointer(
child: Column(
mainAxisAlignment: MainAxisAlignment.center,
crossAxisAlignment: CrossAxisAlignment.center,
children: [
Icon(
Icons.upload_rounded,
color: Colors.deepPurple,
size: 52,
),
Text(
"Swipe up to start",
style: TextStyle(color: Colors.grey.shade800),
)
]),
))),

为了实现这个小部件的拖动行为,一个可滚动的小部件也被放置在顶部,覆盖屏幕的下半部分。“向上滑动开始”也会根据拖动距离进行 translated,一旦跨过阈值(可滚动部件高度的 70%) ,就会播放显示动画。

1
2
3
4
5
6
7
8
9
10
11
12
13
14
15
16
17
18
19
20
21
22
23
24
25
26
27
28
29
30
31
32
33
34
35
36
37
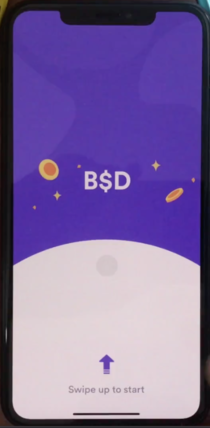
//A simple container with a SingleChildScrollView. The trick is to set the child of SingleChildScrollView height
//exceed the height of parent scroll widget so it can be scrolled. The BouncingScrollPhysics helps the scroll retain its
//original position if it doesn't cross the threshold to play reveal animation.
//This widget is added by _getInitScreenWidgets() method
Positioned(
right: 0,
left: 0,
bottom: 0,
child: Container(
height: widget.height * .5,
child: SingleChildScrollView(
controller: _scrollController,
physics: BouncingScrollPhysics(),
child: Container(
height: widget.height * .5 + .1,
// color:Colors.yellow,
),
),
),
),

//Intercepts the bounce animation and start dragg animation
void _handleSwipe() {
_swipeUpBounceAnimationController.stop(canceled: true);
double dy = _scrollController.position.pixels;

double scrollRatio =
math.min(1.0, _scrollController.position.pixels / _swipeDistance);

//If user scroll 70% of the scrolling region we proceed towards reveal animation
if (scrollRatio > .7)
_playRevealAnimation();
else
setState(() {
_swipeUpDy = dy * -1;
});
}

在显示动画中,使用 CustomPainter 绘制曲线背景和变形虫背景。在动画制作过程中,曲线背景的高度以及中间控制点都被内插到了屏幕高度的 75% 。类似地,用贝塞尔曲线绘制的变形虫也是垂直平移的。

1
2
3
4
5
6
7
8
9
10
11
12
13
14
15
16
17
18
19
20
21
22
23
24
25
26
27
28
29
30
31
32
33
34
35
36
37
38
39
40
41
42
43
44
45
46
47
48
49
50
51
52
53
54
55
56
57
58
59
60
61
62
63
64
65
66
67
68
69
70
71
72
73
74
75
76
77
78
79
80
81
82
83
84
85
86
87
88
89
90
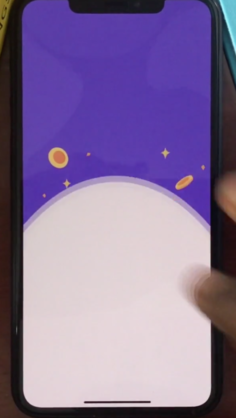
//Update scene state to "reveal" and start corresponding animation
//This method is called when drag excced our defined threshold
void _playRevealAnimation() {
setState(() {
currentScreenState = CURRENT_SCREEN_STATE.REVEALING_ANIMATING_STATE;
_revealAnimationController.forward();
_amoebaAnimationController.forward();
});
}

//Animation controller for expanding the curve animation
_revealAnimationController =
AnimationController(duration: Duration(milliseconds: 500), vsync: this)
..addStatusListener((status) {
if (status == AnimationStatus.completed)
setState(() {
currentScreenState = CURRENT_SCREEN_STATE.POST_REVEAL_STATE;
_postRevealAnimationController.forward();
});
});

//Animation to translate the brand label
_titleBaseLinePosTranslateAnim = RelativeRectTween(
begin: RelativeRect.fromLTRB(
0,
widget.height -
_initialCurveHeight -
widget.height * .2 -
arcHeight,
0,
_initialCurveHeight),
end: RelativeRect.fromLTRB(
0,
widget.height - _finalCurveHeight - 20 - arcHeight,
0,
_finalCurveHeight))
.animate(CurvedAnimation(
parent: _revealAnimationController, curve: Curves.easeOutBack));

//Animation to translate side icons
_sideIconsTranslateAnim = RelativeRectTween(
begin: RelativeRect.fromLTRB(
0,
widget.height -
_initialCurveHeight -
widget.height * .25 -
arcHeight,
0,
_initialCurveHeight),
end: RelativeRect.fromLTRB(
0,
widget.height -
_finalCurveHeight -
widget.height * .25 -
arcHeight,
0,
_finalCurveHeight))
.animate(CurvedAnimation(
parent: _revealAnimationController, curve: Curves.easeInOutBack));

//Tween for animating height of the curve during reveal process
_swipeArcAnimation =
Tween<double>(begin: _initialCurveHeight, end: _finalCurveHeight)
.animate(CurvedAnimation(
parent: _revealAnimationController, curve: Curves.easeInCubic));

//Animation for the mid control point of cubic bezier curve to show acceleration effect in response to user drag.
_swipeArchHeightAnimation = TweenSequence<double>(
<TweenSequenceItem<double>>[
TweenSequenceItem<double>(
tween: Tween<double>(begin: 0, end: 200),
weight: 50.0,
),
TweenSequenceItem<double>(
tween: Tween<double>(begin: 200, end: 0),
weight: 50.0,
),
],
).animate(CurvedAnimation(
parent: _revealAnimationController, curve: Curves.easeInCubic));

//Animation Controller for amoeba background
_amoebaAnimationController =
AnimationController(duration: Duration(milliseconds: 350), vsync: this);

_amoebaOffsetAnimation =
Tween<Offset>(begin: Offset(0, 0), end: Offset(-20, -70)).animate(
CurvedAnimation(
parent: _amoebaAnimationController,
curve: Curves.easeInOutBack));

完成动画后,场景 2 就设置好了。在这个场景中,品牌标题被图标所取代,标签指示器从屏幕左侧显示。

1
2
3
4
5
6
7
8
9
10
11
12
13
14
15
16
17
18
19
20
21
22
23
24
25
26
27
28
29
30
31
32
33
34
35
36
37
38
39
40
41
42
43
44
45
46
47
48
49
50
51
52
53
54
55
56
57
58
59
60
61
62
63
64
65
66
67
68
69
70
71
72
73
74
75
76
77
78
79
80
81
82
83
84
85
86
87
88
89
90
91
92
93
94
95
96
97
98
99
100
101
102
103
104
105
106
107
108
109
110
111
112
113
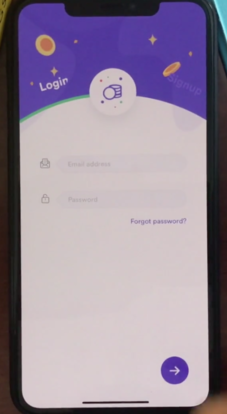
//Animation controller for showing animation after reveal
_postRevealAnimationController =
AnimationController(duration: Duration(milliseconds: 600), vsync: this);

//Scale animation for showing center logo after reveal is completed
_centerIconScale = Tween<double>(begin: 0, end: .5).animate(CurvedAnimation(
parent: _postRevealAnimationController,
curve: Curves.fastOutSlowIn,
));

//_centerIconScale animation used by FAB in the middle
Positioned.fromRelativeRect(
rect: _titleBaseLinePosTranslateAnim.value.shift(Offset(0, 18)),
child: ScaleTransition(
scale: _centerIconScale,
child: FloatingActionButton(
backgroundColor: Colors.white,
elevation: 5,
onPressed: null,
child: Icon(Icons.monetization_on_outlined,
size: 100,
color: isLeftTabSelected
? Colors.deepPurple
: Colors.pinkAccent))),
),

//Tab selection is done by "CurvePageSwitchIndicator" widget
Positioned(
top: 0,
bottom: _titleBaseLinePosTranslateAnim.value.bottom,
left: 0,
right: 0,
child: CurvePageSwitchIndicator(widget.height, widget.width, arcHeight, 3,
true, _onLeftTabSelectd, _onRightTabSelectd),
);


//The build method of CurvePageSwitchIndicator consisting of "CurvePageSwitcher" CustomPainter to paint tab selection arc
//and Gesture detectors stacked on top to intercept left and right tap event.
///When the reveal scene is completed, left tab is selected and the tab selection fly
//towards from the left side of the screen
@override
Widget build(BuildContext context) {
return Stack(children: [
Transform(
transform: Matrix4.identity()
..setEntry(0, 3, translationDxAnim.value)
..setEntry(1, 3, translationDyAnim.value)
..rotateZ(rotationAnim.value * 3.14 / 180),
alignment: Alignment.bottomLeft,
child: Container(
height: double.infinity,
width: double.infinity,
child: CustomPaint(
painter: CurvePageSwitcher(
widget.arcHeight,
widget.arcBottomOffset,
showLeftAsFirstPage,
pageTabAnimationController!),
),
)),
Row(
crossAxisAlignment: CrossAxisAlignment.center,
mainAxisAlignment: MainAxisAlignment.spaceEvenly,
children: [
Expanded(
child: Stack(children: [
Positioned(
left: 0,
right: 20,
bottom: 0,
top: 90,
child: Transform.rotate(
angle: -13 * 3.14 / 180,
child: Align(
alignment: Alignment.center,
child: Text(
"Login",
style: TextStyle(
color: showLeftAsFirstPage
? Colors.white
: Colors.white60,
fontSize: 22,
fontWeight: FontWeight.w800),
)))),
GestureDetector(onTap: _handleLeftTab,
)
])),
Expanded(
child: Stack(children: [
Positioned(
left: 20,
right: 0,
bottom: 0,
top: 90,
child: Transform.rotate(
angle: 13 * 3.14 / 180,
child: Align(
alignment: Alignment.center,
child: Text("Signup",
style: TextStyle(
color: !showLeftAsFirstPage
? Colors.white
: Colors.white60,
fontSize: 22,
fontWeight: FontWeight.w800))))),
GestureDetector(onTap: _handleRightTab,
)
])),
],
),
]);
}

制表符指示器也使用贝塞尔曲线绘制,并定位在场景 1 的曲面背景之上,但在单独的 CustomPainter 中。为了实现制表位选择效果,在绘制制表位选择曲线时使用剪辑路径。

1
2
3
4
5
6
7
8
9
10
11
12
13
14
15
16
17
18
19
20
21
22
23
24
25
26
27
28
29
30
//The paint method of "CurvePageSwitcher" to draw tab selection arc
void _drawSwipeAbleArc(Canvas canvas, Size size) {
Path path = Path();

path.moveTo(-2, size.height - archBottomOffset);
path.cubicTo(
-2,
size.height - archBottomOffset,
size.width / 2,
size.height - arcHeight - archBottomOffset,
size.width + 2,
size.height - archBottomOffset);
path.moveTo(size.width + 2, size.height - archBottomOffset);
path.close();

double left, right;
if (showLeftAsFirstPage) {
left = size.width / 2 - size.width / 2 * animation.value;
right = size.width / 2;
swipeArcPaint.color = Colors.green;
} else {
left = size.width / 2;
right = size.width * animation.value;
swipeArcPaint.color = Colors.deepPurple;
}

canvas.clipRect(Rect.fromLTRB(left, 0, right, size.height));

canvas.drawPath(path, swipeArcPaint);
}

除此之外,两个容器以各自的标签颜色相互顶部放置。根据选定的选项卡,保留相应的容器,将另一个容器 translated 到 x 轴的相反端,从而丢弃另一个容器。

1
2
3
4
5
6
7
8
9
10
11
12
13
14
15
16
17
18
19
20
21
22
23
24
25
26
27
28
29
30
31
32
33
34
35
36
37
38
///The background for selected tab. On the basis of tab selected, the foreground container is translated away,
///revealing the underlying background container. If the screen state is just set to reveal, then in the
///initial state no foreground container is added which is signified by _tabSelectionAnimation set to null.
///_tabSelectionAnimation is only set when either of the tab is pressed.
List<Widget> _getBgWidgets() {
List<Widget> widgets = [];
Color foreGroundColor;
Color backgroundColor;
if (isLeftTabSelected) {
foreGroundColor = Colors.deepPurple;
backgroundColor = Colors.pink;
} else {
foreGroundColor = Colors.pink;
backgroundColor = Colors.deepPurple;
}

widgets.add(Positioned.fill(child: Container(color: foreGroundColor)));

if (_tabSelectionAnimation != null)
widgets.add(PositionedTransition(
rect: _tabSelectionAnimation!,
child: Container(
decoration: BoxDecoration(
color: backgroundColor
),
)));

widgets.add(Container(
height: double.infinity,
width: double.infinity,
child: CustomPaint(
painter: AmoebaBg(_amoebaOffsetAnimation),
),
));


return widgets;
}

因为我不能得到确切的图片和资源,我使用了我能在网上找到的最接近的一个。

所以总的来说,我们得到的结果如下。


© 猫哥

https://ducafecat.tech/

https://github.com/ducafecat

往期

开源

GetX Quick Start

https://github.com/ducafecat/getx_quick_start

新闻客户端

https://github.com/ducafecat/flutter_learn_news

strapi 手册译文

https://getstrapi.cn

微信讨论群 ducafecat

系列集合

译文

https://ducafecat.tech/categories/%E8%AF%91%E6%96%87/

开源项目

https://ducafecat.tech/categories/%E5%BC%80%E6%BA%90/

Dart 编程语言基础

https://space.bilibili.com/404904528/channel/detail?cid=111585

Flutter 零基础入门

https://space.bilibili.com/404904528/channel/detail?cid=123470

Flutter 实战从零开始 新闻客户端

https://space.bilibili.com/404904528/channel/detail?cid=106755

Flutter 组件开发

https://space.bilibili.com/404904528/channel/detail?cid=144262

Flutter Bloc

https://space.bilibili.com/404904528/channel/detail?cid=177519

Flutter Getx4

https://space.bilibili.com/404904528/channel/detail?cid=177514

Docker Yapi

https://space.bilibili.com/404904528/channel/detail?cid=130578