原文

https://medium.com/litslink/flutter-interactive-user-guidanc-e-or-how-to-make-a-hole-in-layout-d72bf6eb27f9

代码

https://github.com/alex-melnyk/flutter_user_guidance

正文

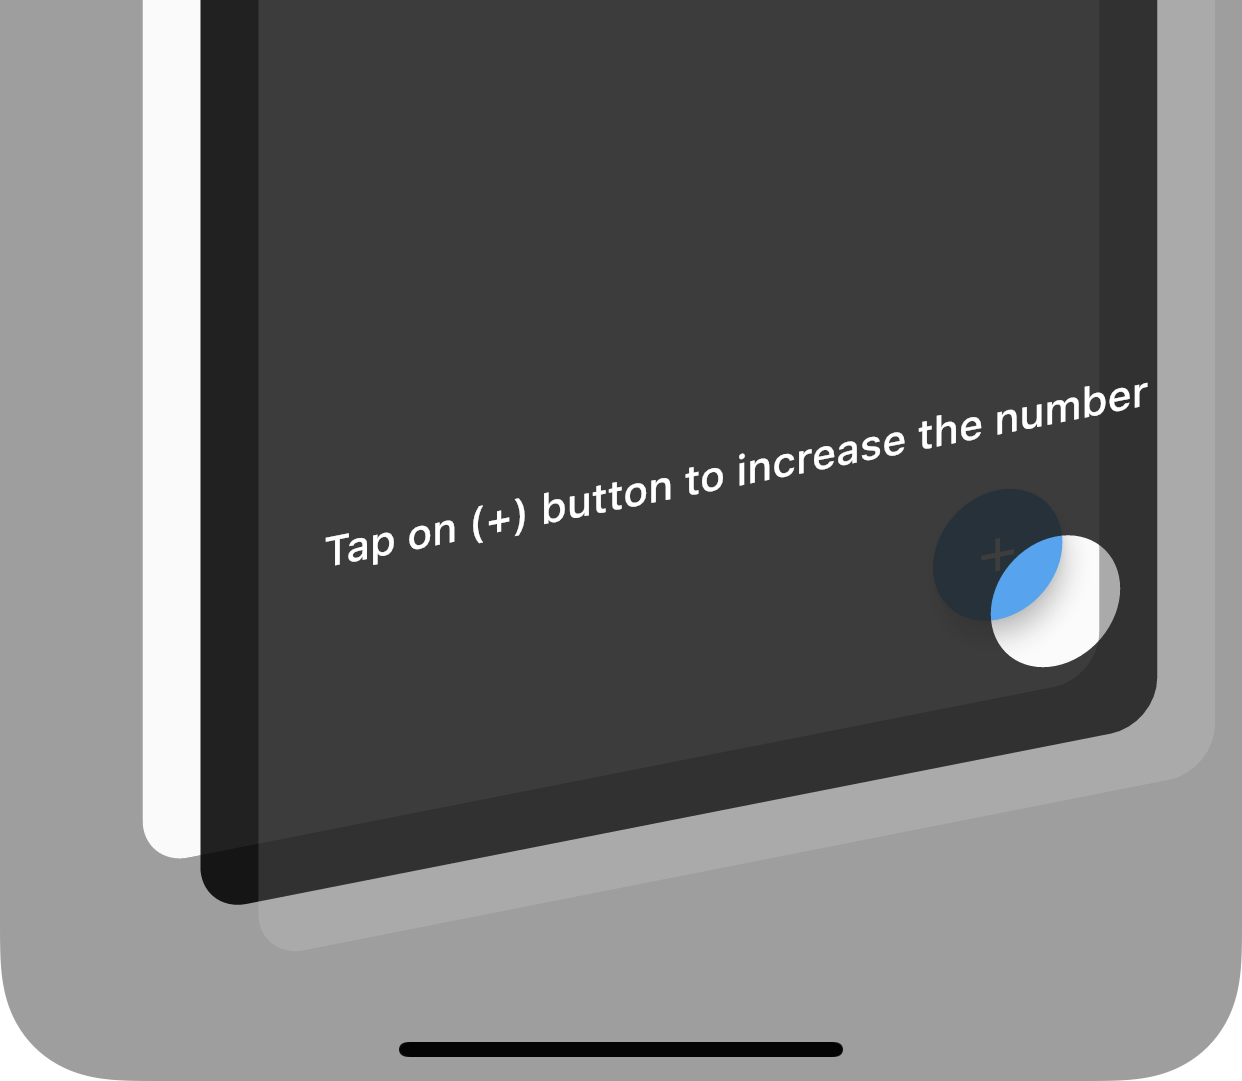
大家好!我想给你看一个有趣的 Flutter 特征。我们可以建立交互式的用户指导使用 blending 混合颜色。

这个简单的技巧可以让你在应用程序中建立有趣的用户指南,而不仅仅是一张图片。它可以真正与动画等互动。

布局

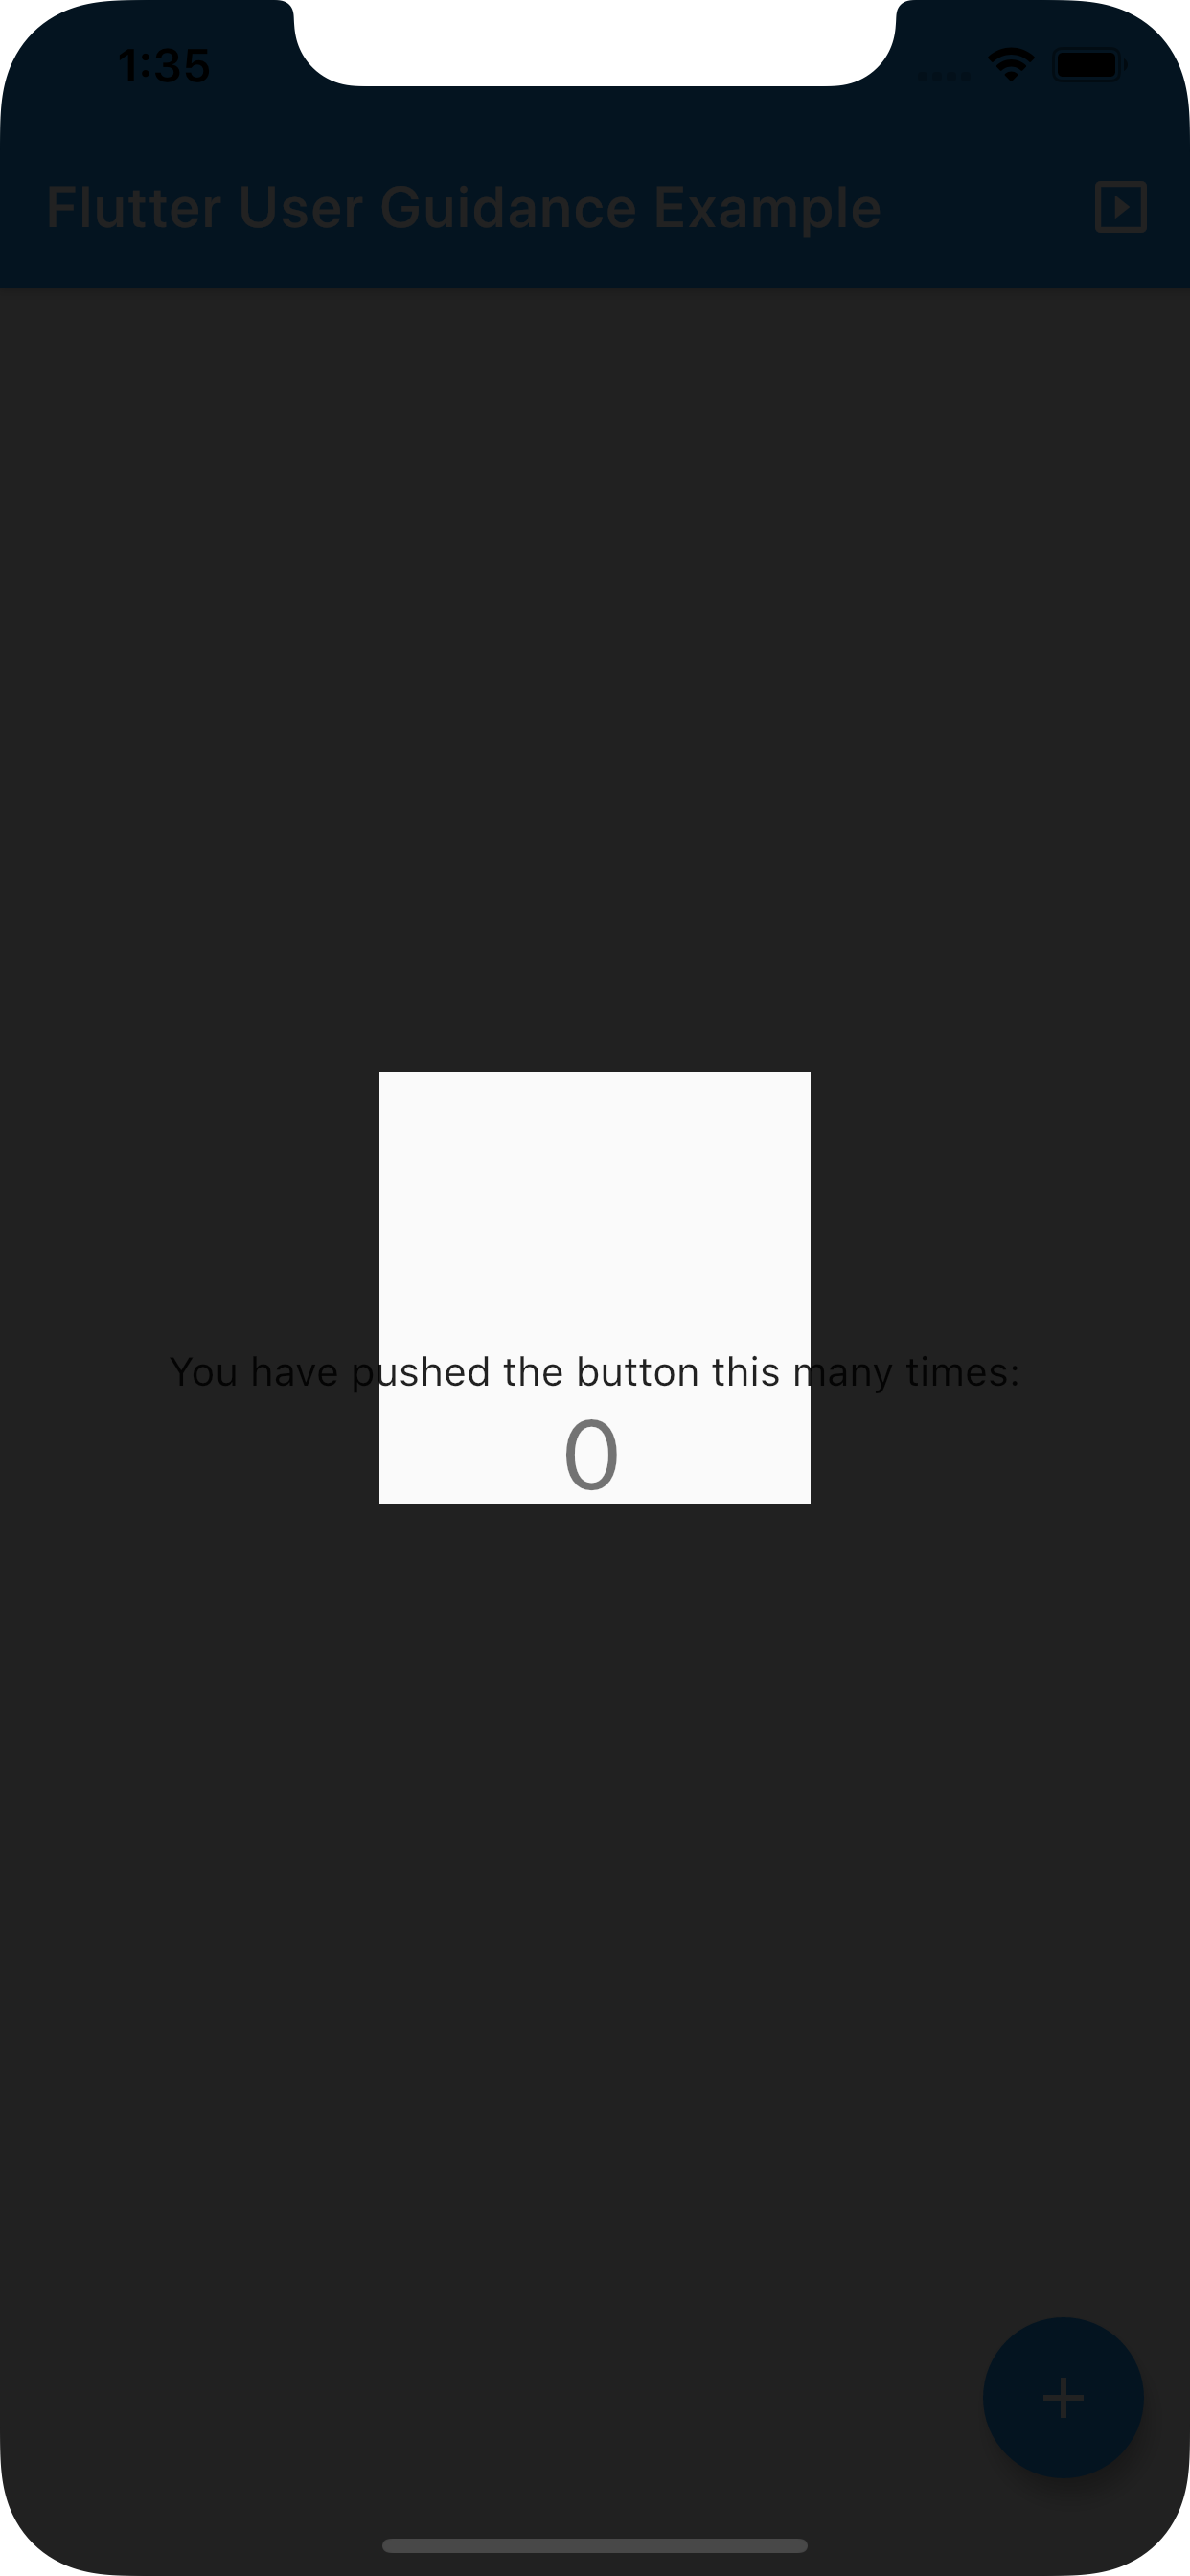
首先,要构建覆盖,您需要将目标页面的 Scaffold 小部件包装到 Stack 小部件中,并将 Scaffold 小部件作为第一个项目保留。

1
2
3
4
5
6
7
8
9
10
11
12
13
14
15
16
17
18
19
20
21
22
23
24
25
26
27
28
29
30
31
32
33
34
35
36
37
38
39
40
@override
Widget build(BuildContext context) {
final theme = Theme.of(context);

return Stack(
children: [
Scaffold(
appBar: AppBar(
title: Text('Flutter User Guidance Example'),
centerTitle: false,
actions: [
IconButton(
icon: Icon(Icons.slideshow),
onPressed: () => _userGuidanceController.show(),
),
],
),
body: Center(
child: Column(
mainAxisAlignment: MainAxisAlignment.center,
children: <Widget>[
Text(
'You have pushed the button this many times:',
),
Text(
'$_counter',
style: theme.textTheme.headline4,
),
],
),
),
floatingActionButton: FloatingActionButton(
onPressed: _handleFABPressed,
tooltip: 'Increment',
child: Icon(Icons.add),
),
),
],
);
}

对于第二个地方,创建一个覆盖整个脚手架的覆盖图,使用一点透明的深/浅背景。Root ColorFiltered 具有混合模式“ source out”,内部 Container 在后台具有“ destination out”,这允许我们剪切小部件以在 root ColorFiltered 小部件中剪切它们。

1
2
3
4
5
6
7
8
9
10
11
12
13
14
15
16
17
18
19
20
21
22
23
24
25
26
27
Positioned.fill(
child: ColorFiltered(
colorFilter: ColorFilter.mode(
Colors.black87,
BlendMode.srcOut,
),
child: Stack(
children: [
Positioned.fill(
child: Container(
decoration: BoxDecoration(
color: Colors.black,
backgroundBlendMode: BlendMode.dstOut,
),
),
),
Center(
child: Container(
width: 150,
height: 150,
color: Colors.white,
),
),
],
),
),
),

例如,在这个例子中,我们有一个容器,大小为 150x150,颜色为白色,需要混合的颜色,不应该是完全透明的,否则你不会看到它。因此,颜色是需要混合,以了解什么地区剪出来。

使用者指引

当然,您需要添加一些单词或元素来引导用户浏览指南。在这种情况下,您可以将小部件放在同一个 Stack 中经过过滤的 root ColorFiltered 上。

1
2
3
4
5
6
7
8
9
10
11
12
13
14
15
16
17
18
19
20
21
22
23
24
Align(
alignment: Alignment.bottomLeft,
child: Material(
color: Colors.transparent,
child: Container(
margin: EdgeInsets.only(
left: 16,
bottom: 38,
),
padding: EdgeInsets.symmetric(
horizontal: 16,
vertical: 8,
),
decoration: BoxDecoration(
color: Colors.white,
borderRadius: BorderRadius.circular(5),
),
child: Text(
'Hello Interactive User Guidance!\n'
'Tap on + button to increase the number...'
),
),
),
),

请记住,Stack 小部件来自 Scaffold 并且没有任何 Material 支持,所以用一个 Material 小部件包装它就足够了。

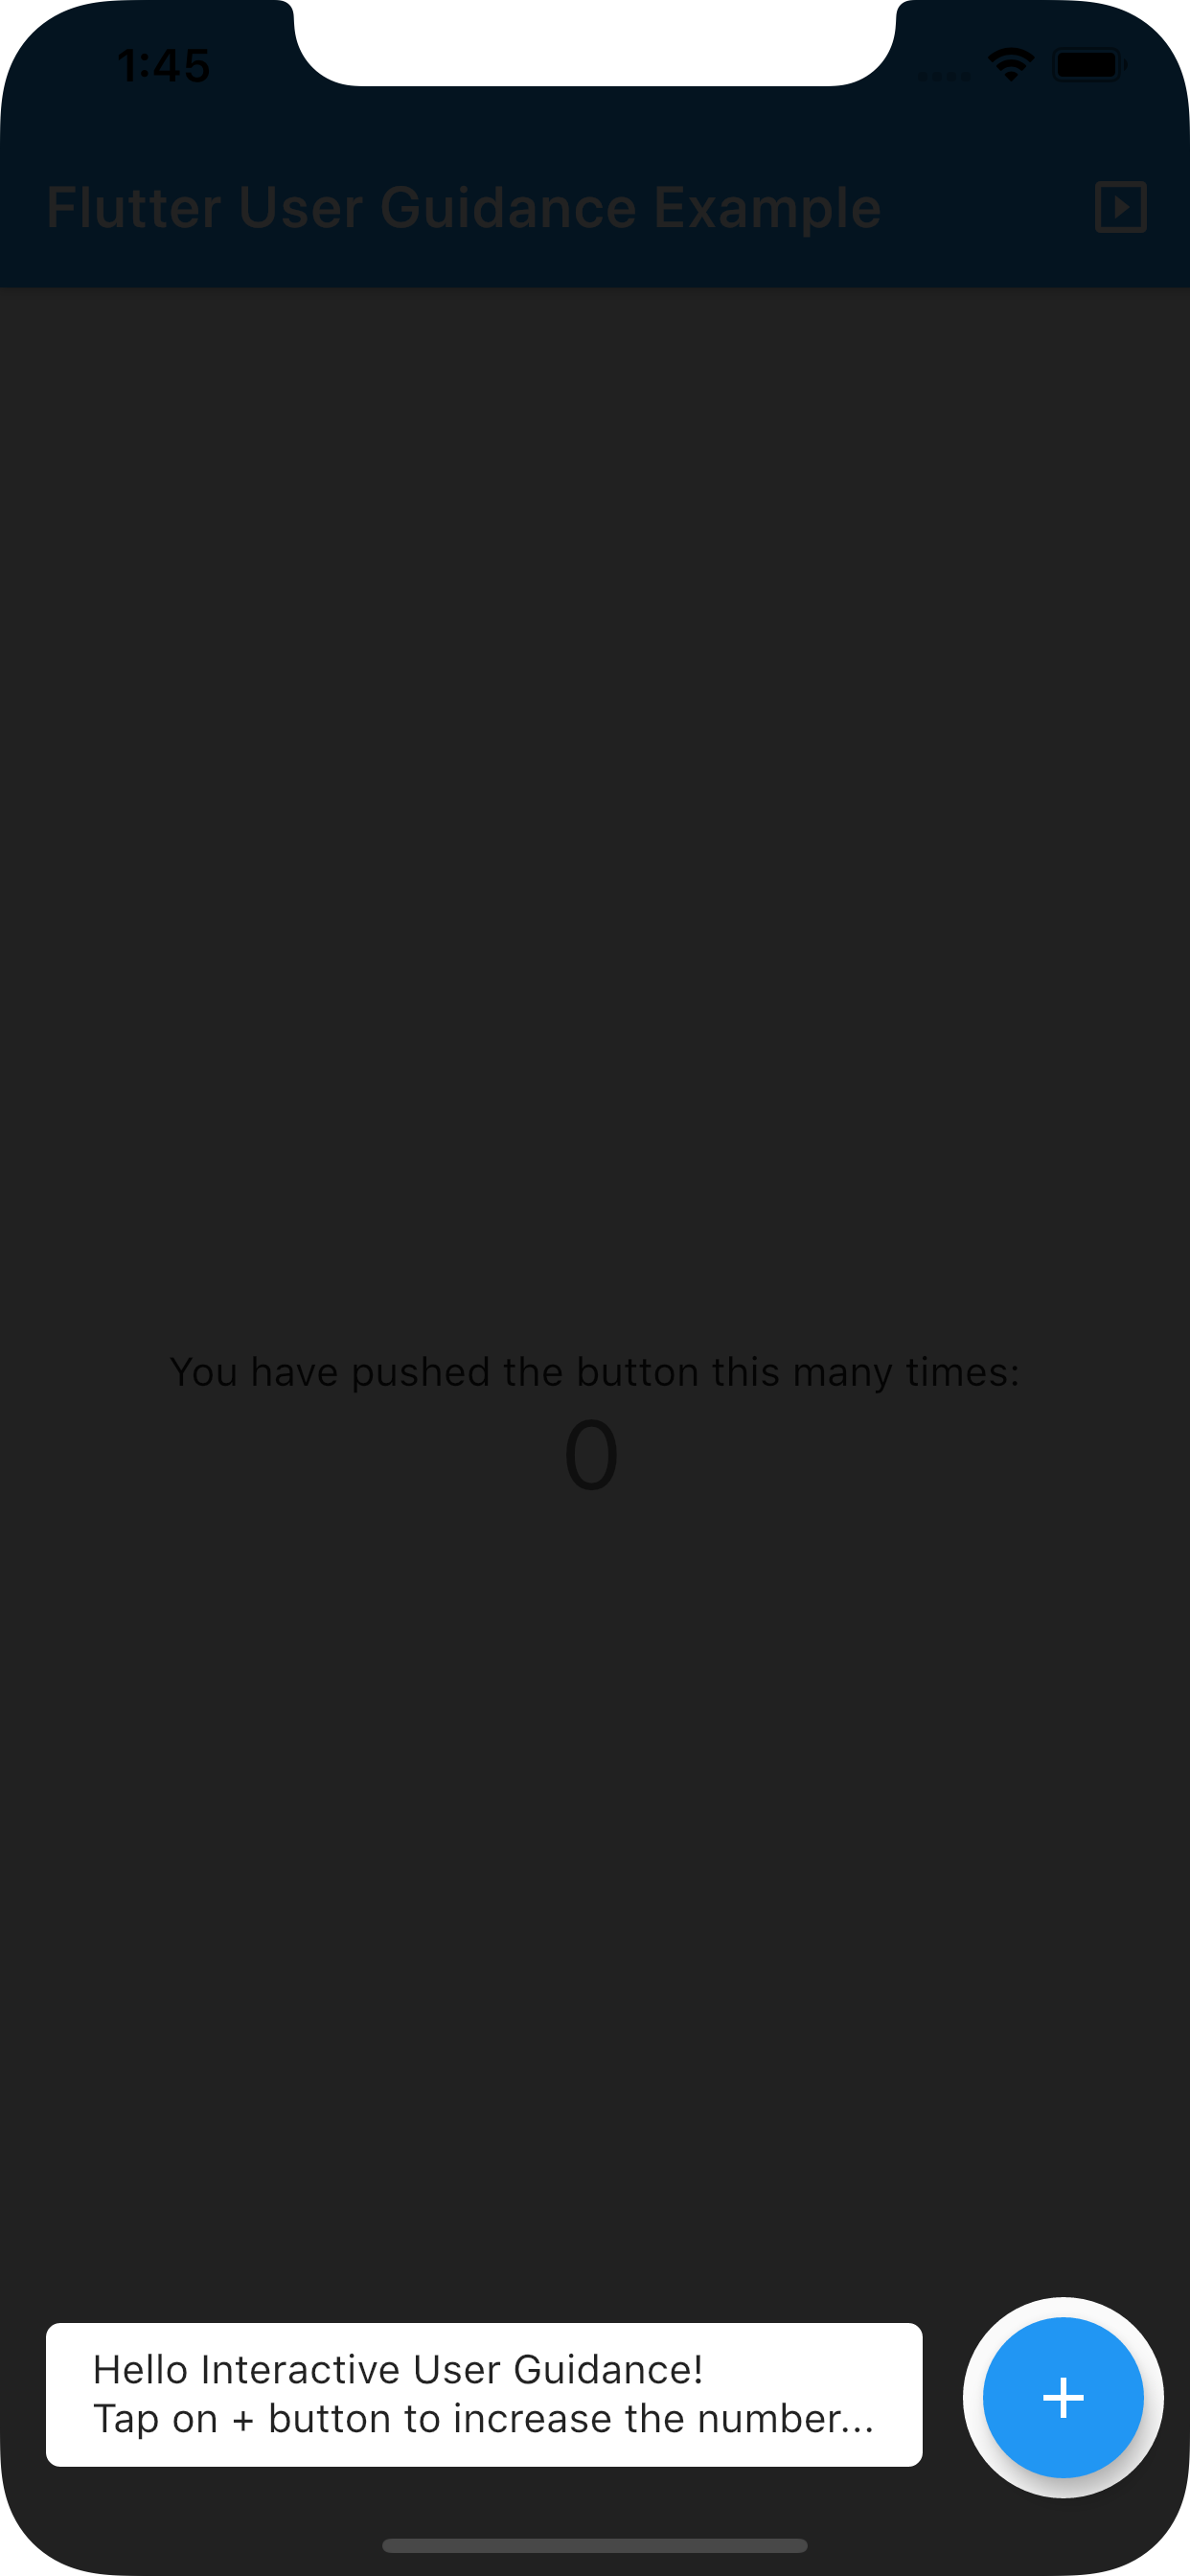
这里有一个完整的例子,如果你把所有这些步骤都做对了,你会看到同样的图片。

1
2
3
4
5
6
7
8
9
10
11
12
13
14
15
16
17
18
19
20
21
22
23
24
25
26
27
28
29
30
31
32
33
34
35
36
37
38
39
40
41
42
43
44
45
46
47
48
49
50
51
52
53
54
55
56
57
58
59
60
61
62
63
64
65
66
67
68
69
70
71
72
73
74
75
76
77
78
79
80
81
82
83
84
85
86
87
88
89
90
91
92
93
94
95
96
97
98
99
@override
Widget build(BuildContext context) {
final theme = Theme.of(context);

return Stack(
children: [
Scaffold(
appBar: AppBar(
title: Text('Flutter User Guidance Example'),
centerTitle: false,
actions: [
IconButton(
icon: Icon(Icons.slideshow),
onPressed: () => _userGuidanceController.show(),
),
],
),
body: Center(
child: Column(
mainAxisAlignment: MainAxisAlignment.center,
children: <Widget>[
Text(
'You have pushed the button this many times:',
),
Text(
'$_counter',
style: theme.textTheme.headline4,
),
],
),
),
floatingActionButton: FloatingActionButton(
onPressed: _handleFABPressed,
tooltip: 'Increment',
child: Icon(Icons.add),
),
),
Positioned.fill(
child: ColorFiltered(
colorFilter: ColorFilter.mode(
Colors.black87,
BlendMode.srcOut,
),
child: Stack(
children: [
Positioned.fill(
child: Container(
decoration: BoxDecoration(
color: Colors.black,
backgroundBlendMode: BlendMode.dstOut,
),
),
),
Align(
alignment: Alignment.bottomRight,
child: Container(
margin: EdgeInsets.only(
right: 9,
bottom: 27,
),
width: 70,
height: 70,
decoration: BoxDecoration(
color: Colors.white,
shape: BoxShape.circle,
),
),
),
],
),
),
),
Align(
alignment: Alignment.bottomLeft,
child: Material(
color: Colors.transparent,
child: Container(
margin: EdgeInsets.only(
left: 16,
bottom: 38,
),
padding: EdgeInsets.symmetric(
horizontal: 16,
vertical: 8,
),
decoration: BoxDecoration(
color: Colors.white,
borderRadius: BorderRadius.circular(5),
),
child: Text(
'Hello Interactive User Guidance!\n'
'Tap on + button to increase the number...'
),
),
),
),
],
);
}

动画和步骤

我准备了一个简单的例子,通过动画剪辑区域从矩形切换到圆形并移动,从一个指导切换到另一个。只要查看我的仓库,就能获得这种体验。

完整的项目源代码可以在 GitHub 上找到。

https://github.com/alex-melnyk/flutter_user_guidance


© 猫哥

https://ducafecat.tech/

https://github.com/ducafecat

往期

开源

GetX Quick Start

https://github.com/ducafecat/getx_quick_start

新闻客户端

https://github.com/ducafecat/flutter_learn_news

strapi 手册译文

https://getstrapi.cn

微信讨论群 ducafecat

系列集合

Dart 编程语言基础

https://space.bilibili.com/404904528/channel/detail?cid=111585

Flutter 零基础入门

https://space.bilibili.com/404904528/channel/detail?cid=123470

Flutter 实战从零开始 新闻客户端

https://space.bilibili.com/404904528/channel/detail?cid=106755

Flutter 组件开发

https://space.bilibili.com/404904528/channel/detail?cid=144262

Flutter 组件开发

https://space.bilibili.com/404904528/channel/detail?cid=144262

Flutter Bloc

https://space.bilibili.com/404904528/channel/detail?cid=177519

Flutter Getx4

https://space.bilibili.com/404904528/channel/detail?cid=177514

Docker Yapi

https://space.bilibili.com/404904528/channel/detail?cid=130578